30
Nov
2018
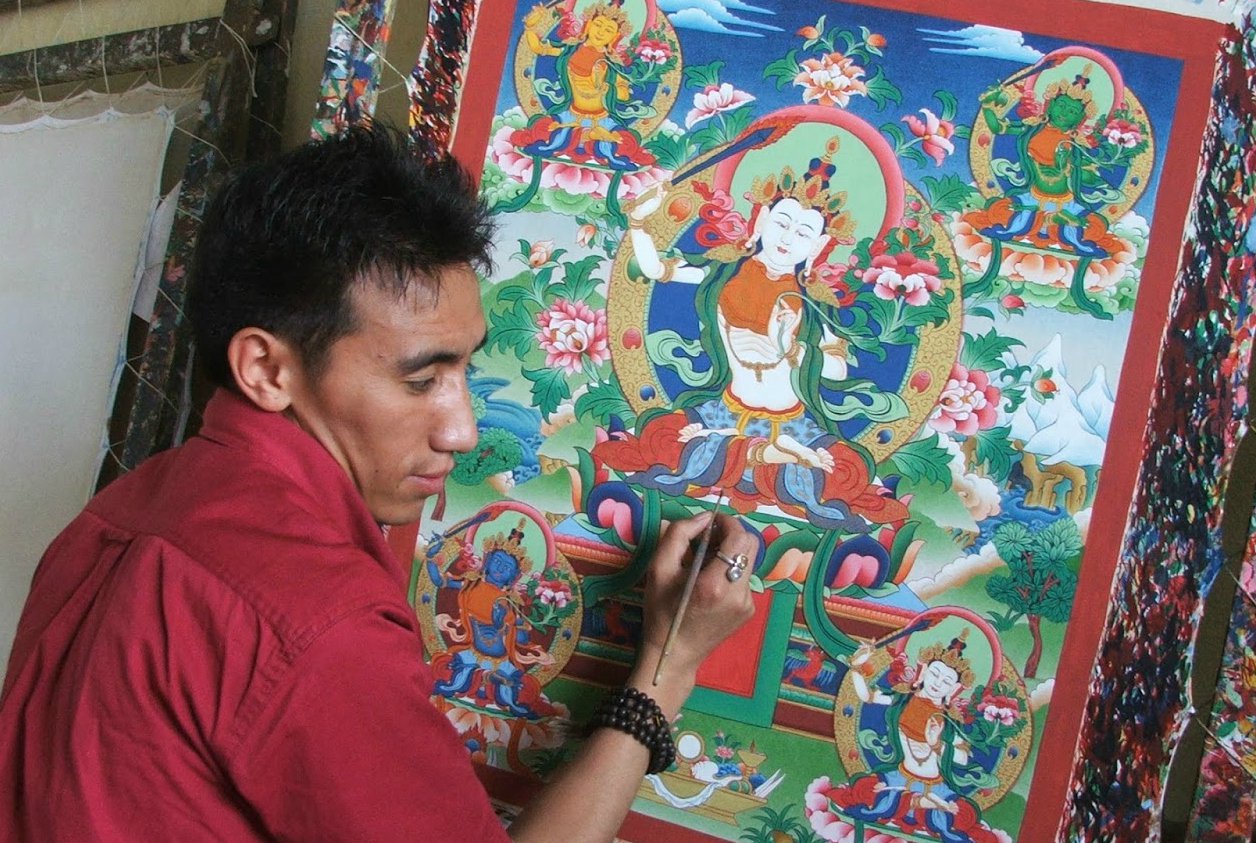
The painters of Tibet pursued their art in an orderly and systematic I way. When creating thangka scroll paintings they proceeded through six clearly defined steps:
Although Tibetan artists knew of more than one painting medium when painting thangkas they applied their basic coats of color in distemper. Distemper paints consisted of powdered pigments mixed with a binder of gelatin size (a dilute solution of hiding glue).
Such paints were fast-drying and water-soluble, and they dried to a matte finish. Other binders were also known to Tibetan artists, including linseed oil and gluten from roasted wheat, but these did not have wide applications in either thangka or mural painting.
With very few exceptions, size or hide glue (spyin; ka spyin) was the binder. Hide glue, moreover, could be employed in different ways. The most commonly used mixture of glue and pigment was the standard opaque distemper. The technique that used such paints was called in Tibetan rdzags tshan (“complete colour”) or tshan chen (“great colour”). There was also a contrasting technique that employed thinner, more transparent washes of paint. Called hang tshan (“faint colour”) by some artists, the latter technique stoo.d in relation to the opaque distemper as watercolor to gouathe.
In the past, the hang tshan technique was sometimes used as a’ shortcut method in mural painting, but in the painting of thangkas, it was normally employed only for coloring very small figures. Distemper paints by their nature called for a deliberate and almost businesslike procedure. To begin with, such paints worked best with a clear and well-defined design. Distemper was suited to designs that contained relatively large and distinct areas of color and became more difficult to handle with designs that had many small or convoluted areas of different colors.
Support and Ground Tibetan painters, like the artists of many other countries, laid down their colours on a painting surface that consisted of two main layers a support and a ground. At the core of the painting surface, there was a supporting material such as a cloth, a wooden panel or a bare wall.
This underlying material held or “carried” the subsequent layers of ground and paint, and it was what is called the support of the painting. Although artists in Tibet painted on a variety of supports, for the depiction of religious subjects the most common supports were walls and cloth.
Without additional preparation, however, neither of these materials was suitable for painting therefore another layer, consisting of a “gesso” or a similar mixture, had to be applied over the support. Such a top layer, which completed the painting surface, was what is called the ground of the painting. No matter what the support, it was very important to prepare a proper ground over it.
Any defects in workmanship at this stage were apt to show up later in the overlying layer as cracking, crumbling or peeling paint. In the case of thangkas, the preparation of a good ground was even more important, since thangkas were painted on a cloth support (ras gzhi). They were rolled up for transportation or storage and then unrolled for display.
The preparation of a good painting surface was not very difficult. By following the procedures established within the artistic traditions even a beginner could prepare a canvas that with proper handling could last for centuries. It seems, in fact, that most of the damage done to the old thangkas that survive was not caused by defects or deficiencies in the ground, but by external causes such as water or smoke, or by the surprisingly rough treatment to which even exquisite masterpieces were sometimes subjected.
The first item required for the making of a thangka was a suitable piece of fabric, and the most common cloth used by our main informants in Tibet was a plain-weave Indian muslin.
Similar cotton fabrics from China were also sometimes used, particularly in eastern parts of Tibet. In all of the cases that we observed in India and Nepal, modern artists used a light-weight Indian cotton of fine but slightly open weave. Legdrup Gyatsho, one of our main informants, stated that it was advantageous to use finely woven cloths since these were less trouble to coat with gesso.
Cotton of coarser weave required thicker coats of gesso to fill in their textured surface. Nowadays the cotton fabric is available in quite wide dimensions.
In Tibet, however, it was often necessary to stitch together two pieces of cloth when preparing the support for larger paintings. Before the preparation of the cloth support, the cloth sometimes needed washing. This has become even more important in recent years for painters who use modern Indian cotton.
The latter commonly contain manufacturer’s size, which affects the application of the primer and ground. After the sizing had been washed out the cloth usually shrank a bit as it dried.
Then, when completely dry, the painter could cut the cloth to fit the wooden stretcher frame. In the past, scroll paintings were also executed on other materials such as silk, linen and leather or skin. In addition, one occasionally comes across paintings made on block-printed silk or paper. But in modern thangka painting, these support materials are relatively rare.
The painting surface of the thangka was made from a cotton cloth by stretching it in a wooden stretcher frame (rkyang shing) and then coating it with a layer of white paint for the ground. Many painters prepared this “canvas” (ras gzhi) themselves, but it was also common for them to leave this task to their assistants or students.
Tibetan painters used stretchers of various dimensions, but the most common type for a single thangka was rectangular and approximately two by three feet. To fit within this outer wooden stretcher the cloth was cut approximately thirty inches long by twenty inches wide.
The cloth was so much smaller than the stretcher because the fabric was not attached directly to the stretcher, but had to be tied within it by a looping string. When the cloth was fastened, the cloth and stretcher looked something like a miniature trampoline. Not surprisingly, since the wooden stretchers were one of the artist’s necessities, a painter often insisted that they are made according to his precise specifications.
Some of the better stretchers that we saw had been constructed by carpenters out of seasoned hardwood strips measuring approximately two inches wide by one inch thick. The four pieces were often joined by snugly fitted mortise and tenon joints. The tenons projected from both ends of the shorter pieces and fitted into mortises near the ends of the longer strips.
The ends of the two longer pieces usually extended several inches past the point of junction with the shorter strips. During painting the artist commonly positioned the stretcher with one of the short sides resting on his lap, and thus the projecting ends of the longer sides prevented the stretcher from shifting. Wooden stretchers of this type did not need nailing and were renowned for their sturdiness, whereas those that were made without interlocking joints soon became loose and wobbly.
Fastening the cloth to the stretcher usually involved two main steps. First, the painter stitched a sort of inner frame, which consisted of four supple twigs or bamboo splints, to the four edges of the fabric. Second, he fastened this cloth with its light frame of twigs to the heavier outer stretcher by.a series of loops of twine.
The use of an inner frame helped to distribute the tension evenly around the edges of the fabric during the priming of the cloth support and to maintain that even tension until the completion of the painting. Any bulging in the fabric that developed during the preparation of the canvas due to uneven tension became a permanent feature that could not be corrected after~ the coats of size and gesso had dried.
To prepare the inner frame the artist first cut four sticks of bamboo or twigs of some supple wood a few inches longer than the sides of the cotton cloth. These sticks could be about one-quarter or three-eighths of an inch in thickness – thick enough to support tension but not so thick as to be inflexible.
Before fastening the sticks to the edges of the cloth, some artists began by scoring all four edges of the cloth with a large needle, dragging the tip of the needle in a line about three-quarters of an inch within the borders. This established a crease along which the artist could then easily fold back a thin strip on each edge.
He next placed the first stick outside the cloth, alongside one of the creased and folded edges, and sewed the stick to the cloth with a series of evenly spaced overhand stitches about half an inch to one inch apart, using a large needle and some strong thread. When the artist reached the corner of the cloth (which was also near the end of the stick), he placed them next stick over the preceding one at a right angle, parallel to the next side of the cloth, and wrapped a few loops of the heavy thread around the intersection of the two sticks.
After that, he continued to stitch on as before, until reaching the next corner. There he repeated the procedure with the next stick, placing the third stick underneath the second. Continuing in this way, when he reached the last corner he securely tied and knotted the thread.
Artists in Lhasa sometimes gathered bamboo canes for use in making inner stretcher frames from the bamboo groves of the Norbu-lingka, the Dalai Lama’s summer palace. If the artists could not get the thin canes, they could prepare suitable splints by splitting and whittling down larger and thicker pieces of bamboo.
In mountainous parts of Tibet where bamboo did not grow the artists used straight sticks from various trees. Newly cut sticks, being more pliant, were preferred to old wood. Larger thangkas were often too long for a single small stick to extend the full length of the cloth. In such cases the artists sometimes tied two or three small sticks together at their ends, forming a line that ran the full length of the long edges of the cloth.
Once the inner frame had been completed it was placed within the outer stretcher frame and lashed to it. For this, the painter took a strong and very long, non-stretching cord, and knotted one end of it to one of the projecting corners of the outer stretcher.
Then he began to work his way around the stretcher, looping the cord at regular intervals around the outer stretcher and passing it through the gaps between the inner frame and the cloth. After the stretcher and inner frame were tied together on all sides he tied the loose end to the same corner from which he had begun.
Then he went around the stretcher again, pulling each loop to gather any excess slack and taking care not to let the cloth and inner frame be pulled out of alignment. When he again reached the end, he re-tied the cord tightly at the corner.
It was important for the cloth and inner frame to be at least two inches or so smaller in length and breadth than the outer stretcher because the cloth stretched during priming, and if it was not given enough space it would stretch until it reached the outer edge. When this happened it was often impossible to tighten the cloth sufficiently and the “canvas” thus became slack and prone to warping.
Nevertheless, in some cases the artist could still do something to correct this problem we once observed an artist who inserted small wedges of wood into the joints of the stretcher. The wedges pushed apart the boards, slightly expanding the size of the stretcher and making just enough extra room for the cloth support to be drawn taut.
The use of an inner frame of sticks, although a widespread custom, was not a necessity, and many painters found ways to do without it. One alternative method entailed the stitching of a heavy cord all along the scored and folded-back edge of the cloth, much as the inner frame of twigs was sewn in place. This was the method of Wangdrak, the artist from Shekar Dzong.
When preparing the rope frame around the cloth, he left a special loop at each corner that could be pulled to tighten the cloth during priming. Then he attached the cloth with its rope frame to the outer wooden stretcher in the same manner as with the inner frame of wooden twigs.
Wangdrak said that he had picked up this method from some painters from Amdo with whom he had worked in India. He adopted it, he said, because it saved him the trouble of having to find sticks and yet still gave good results. An inner frame of rope was especially suitable for the painting of oversized thangkas and many painters used it for this purpose. Unlike the cloth supports with sticks for their inner frames, those with rope frames could be rolled at the top and bottom and lashed tightly at the sides.
This allowed an artist to execute very tall paintings in a room with a low ceiling, and even in rooms with high ceilings, it did away with the need for scaffolding or ladders. But to begin with, such large canvases had to be stretched on an oversized stretcher. Then they could be rolled as necessary on one or both ends and then tied within a smaller stretcher. Some artists omitted the inner frame of rope or sticks entirely, and merely scored and turned back the edges of the cloth for reinforcement.
Then with needle and a strong doubled string, they attached the cloth within the outer stretcher by a series of regularly spaced looping stitches. As with the other methods, these artists first secured the end of the string to a corner of the stretcher before making the first stitch and once the cloth was loosely sewn in place they increased the tension of the cloth by going around the stretcher again, tightening the string loop by loop.
The advantage of using an inner frame of twigs or rope was that much larger projects could be undertaken with less risk of losing the tension on the primed surface of the thangka. The single-frame methods were quicker and simpler, but with them, there was more danger that the strings (which had to be small enough to be sewn with a large needle) would break during priming or painting. However, any one of these methods would give good results if carefully applied.
To prepare the cloth as a suitable painting surface some of our informants from Central Tibet performed three operations sizing the fabric, applying the gesso, and polishing the gesso. Sizing, the first step, coated and stiffened the cloth.
It was quick and easy the task mainly consisted of preparing a solution of warm hide glue and applying that to both sides of the cloth with the help of a large brush and wadded-up rag. After the cloth became saturated and any excess had been wiped away, the artist tightened the cord that connected the cloth to the stretcher, and then set the canvas aside to dry. Many artists, however, did not apply size to the cloth in a separate operation. Instead, they began by applying a coat of gesso.
In Tibet, the adhesive used for sizing consisted mainly of gelatin. Tibetan artists could produce this gelatin or size by boiling clean, dry skin or leather in water. Prolonged heating at about boiling point caused the protein collagen, one of the main constituents of the skin, to change into gelatin as the skin itself slowly dissolved.
When the transformation was complete, the artists strained the liquid to remove any solid residue. Then, when it had cooled and had begun to set, they poured it out into a clean pan so that it’ would congeal into a thin flat sheet. Once the gelatin size had set and cooled completely, the artists often cut it into strips.
Then, to speed up the drying, they either hung the strips over a rope in a warm, dry place or laid them out on a piece of cloth until the gelatin was hard and dry. In this state chunks of size could be stored indefinitely.
The painters of Tibet preferred to use the purest size available, which was usually a gelatin made from skins alone. Such size of the best quality – which was also the “glue” for mixing paints – was known as “deity-glue” (lha spyin), and it was made from skins that were free from fat, hairs and other impurities?
Nowadays most of the Tibetan artists livin& in India and Nepal do not use the traditional sizes made from yak or cow skins. Instead, they obtain their size and binder from ready-made glues that are available in the local bazaars.
In Nepal, one common type is said to be prepared from water buffalo skins. These glues are sometimes of low quality, and in that case have to be warmed, skimmed and filtered. It is difficult to say whether these common adhesives of India and Nepal are actually size or glue since glue, properly speaking, is partly made up of gelatin but also contains other proteins and organic materials, whereas size is a more or less pure gelatin produced from skins.
The preparation of size from the dried gelatin or hide glue simply consisted of soaking a piece of the adhesive in water and then gently warming it. The size was normally mixed in relatively small quantities – just enough to last for a day or two. When mixing it or reheating it the artist had only to take care that he did not darken it by placing it over too hot a fire.
Usually, he would warm it gently by placing its pot over a brazier that contained a few hot coals. The strength of the dried size varied a little from batch to batch, but this made no difference to the painters, who always mixed their binders by “feel” and not by measure.
In the absence of recipes, the artists performed simple tests to judge the strength of the size. For example, some painters would rub a little between the thumb and index finger, and then quickly press together and pull apart the finger and thumb several times. As they did so, the water evaporated from the size and the strength of the solution became apparent the tackier the size, the more the finger and thumb stuck together.
Also, when accustomed to the same type of size or glue, an artist could tell something of its strength just from its odor. After the size had been evenly applied to both the front and back of the painting and the fabric had been tightened again, the painter set the stretcher aside and allowed the cloth to dry completely.
Most artists preferred to dry it slowly, and many advised against putting the newly sized fabric into hot direct sunlight. They usually dried their sized canvases either inside or in a shady spot out of doors.
Once the cotton support had been stretched and ‘sized, there only remained the application of a layer of gesso and its polishing to complete the preparation of the ground. When properly applied and finished this layer of gesso united with the underlying cloth, presenting the painter with a surface that was excellent for both sketching and painting.
Mixture of the most available white earth pigment – either a chalk or a white clay (kaolin) – added to some size solution.s The usual Tibetan name for their white earth color was ka rag, although it was also known as sa dkar (“white earth”) or dkar rtsi (“whitewash”).
Where whites of the best quality were scarce, any local whitish earth could be substituted, providing that it had been properly washed, ground, and filtered through a cloth.9 After a coat of this gesso the white cotton support became even whiter. It should also be noted that some painters, particularly those from Eastern Tibet, preferred a gesso that had a slightly ochreish hue. To achieve this they added a small amount of ochre or yellow pigment to the gesso.
To prepare the gesso the painter began by partially filling a painted bowl with some of his finely ground dry white pigment. He next poured in a little size solution, stirring it in with a blunt-ended stirring stick (snur skyogs). He then continued to add size, a little at a time, until the powder became the consistency of stiff dough.
He carefully stirred and ground this mixture for some time, using the pestle-shaped end of the stirring stick to crush any lumps or pockets of dry pigment. When it had become thoroughly mixed he added a little more size, and continued to stir.
Sometimes he tilted the bowl to the side and ran his stirring stick along the bottom to make sure that all of the heavy lumps had been pulverized. Finally, he added just enough size solution to bring the gesso to the consistency of buttermilk – the preferred consistency not only for gesso but also for paints in general.
This mixture was then strained through a cloth to eliminate any remaining lumps or bits of solid matter. As usual, the Tibetan painter did not use measures when preparing gesso.
Nevertheless, when questioned, one artist estimated that he used approximately two parts of ka rag to one part of size solution. There was a certain amount of leeway in how strong the size had to be. Some artists said that for gesso the size should be almost twice the strength of the ordinary size solution.
But others employed a size of about the same strength as they used for sizing the cloth and for mixing ordinary paints. To apply the gesso to the cloth, our main informants used a wadded-up rag or a gesso knife (‘dam khri). Some other artists also used oversized brushes. Whichever applicator was used, the gesso had to be applied in thin, even coats to both sides of the stretched cloth.
Wangdrak, who used a gesso knife, applied the gesso sparingly, using the rounded tip of the knife as a spatula, and being careful to scrape off the excess gesso and leave a clean, smooth surface. The artist Legdrup Gyatsho, one of those who applied the gesso with a rag, smoothed it while it was still wet and worked it into the support by rubbing the surface with the heel of his hand.
With his hand, he also wiped off the excess. Afterward, when the cloth support had become saturated with gesso, both artists again tightened the strings around the stretcher frame, making the canvas taut and flat.
Next, when the first coat of gesso on both sides of the cloth had dried, the artist had to determine whether a single coat had provided enough coverage. He would hold the canvas up to a source of light and if he could see many “pin holes” onight he knew that he had to apply another coat.
Care had to be taken in obtaining the correct proportion of pigment to size. Too much size in the mixture resulted in a hard and brittle canvas which might crack and also cause flaking of the colors applied over it, due to not enough ‘grip’ in the excessively sized surface.
Not enough size in the mixture could also cause flaking and powdering, especially when the thangka has been rolled and unrolled many times. A mixture of the right ‘grip’ was obtained through experience.
The final step in the preparation of the ground was to make the surface perfectly smooth and even by polishing it. Some Tibetan painters actually used two types of polishing one called “damp polishing” (rZon dbur), which was polishing over a dampened surface, and the other called “dry polishing” (skarn dbur), burnishing over a dried coat of gesso.
Damp Polishing Once the earlier coats of gesso had dried and the artist was convinced that they gave enough coverage to constitute a good ground, the next step was to moisten slightly a portion of one side of the cloth in preparation for polishing. No more than a third or a fourth of a standard-size canvas needed to be moistened at a time, otherwise parts of it would begin to dry before the polishing was finished. Next, the artist had to lay the stretcher over a smooth board or some other smooth surface.
Then, taking a polishing stone (dbur rdo, usually a smooth alluvial stone) or some similar hard object with a smooth, rounded bottom, such as a conch-shell, he rubbed the moistened part of the gesso, working back and forth along one axis of the cloth. Having completed that area, he then moistened and polished another part of the cloth, and continued until the whole of one side had been gone over once Both sides of the cloth required damping and polishing in this manner.
However, before the artist could proceed to burnish the back, he had to wait until the cloth had completely dried, but he did not need to stop work if he was preparing a batch of several canvases simultaneously. By the time he had finished burnishing his third or fourth canvas on one side, the first canvas would be dry and ready to be done on the reverse side.
The artists we worked with usually polished each side of the cloth twice by this damp-burnishing method. If the surface had been polished along the vertical axis the first time, the artist would burnish it along the horizontal axis the second time. Others only polished the canvas once on each side. Burnishing the dampened canvas made it smooth and even so that the texture of the underlying cloth stood out less.
A smooth board beneath the cloth during polishing facilitated this process by allowing the artist to bear down a little without gouging the canvas. Dry Polishing Having burnished the cloth on both sides, some painters next carefully examined each side for its merits and defects.
Then they turned the best side down and polished the back of the canvas one last time. This time they applied no water to the dry gesso they simply rubbed it with the polishing stone. This was the so-called dry polishing, which left the back of the cloth with a very smooth and sometimes even a glossy finish.
The better side of the cloth was not dry burnished. It was the side to be painted, and the final damp burnishing left it a bit more textured. This was desirable since the painting side of the canvas needed more “tooth” for it to accept paint readily. But some painters, such as Wangdrak, did not dry polish at all during this stage.
Painters from different regions and different artistic traditions sometimes departed from the above-generalized method. One finds, for example, a record of a painter from Ladakh who when stretching his cotton cloth sewed dried barley stalks to the edges of the cloth to serve as his inner frame.
Another Ladakhi artist, Wangchuk, a present-day painter who was trained by a master from Gtsang, used to apply alternating damp and dry burnishings to both sides of the cloth until he had achieved the desired surface quality. And there are many other variant methods, far too many for us to list them all.
But in spite of these differences, it is clear that the basic methods for preparing the cloth support in thangka painting are very old and have been passed down from teacher to student over many generations. A description of a very similar method survives, for instance, in the writings of the 15th-century master Bo-dong PaIl-chen Phyogs-las-rnam-rgyal.
The cloth supports and gesso grounds used by living painters from the various schools and regions differ slightly in their appearance and constitution.
The painter Wangdrak, for instance, described the ideal thangka canvas as resembling soft deerskin, and his canvases were quite soft and pliant by Central Tibetan standards.
By comparison, the canvases used by some other informants from Dbus and Gtsang were somewhat heavier and less flexible, while those of some Eastern Tibetan artists were often even softer and finer than Wangdrak’s.
Still, certain characteristics were valued by all Tibetan artists. The gesso ground had to be strongly fixed to the underlying cloth, and not so thick or brittle that it cracked when rolled and unrolled. It had to be smooth, so as not to impede in any way the detailed sketching and painting that were executed upon it, but not so smooth that it lost its porosity.
It also had to be free from excessive gille in the ground, so that the paints readily and permanently attached themselves to it. If the major defects could be avoided and the main necessities achieved, the painter was free to follow whatever minor variations in technique suited him or his tradition.


